

WE Provide Customer-Driven Design & QualityCraftsmanship
Seasonal Shade Sail Care
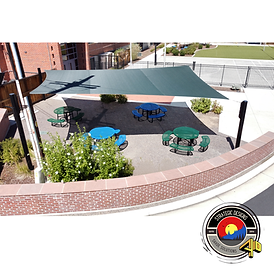
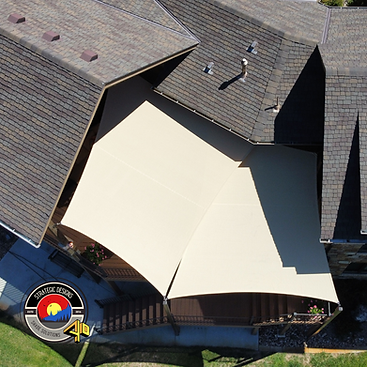
A seasonal shade sail system provides dependable shade during Colorado’s warmer months and can be removed before winter weather arrives. Proper seasonal care protects the fabric, hardware, and supporting structure while making spring reinstallation easier.
The Most Important Rule
Shade sails are designed for shade—not snow loads. Do not wait until snow or ice has already collected on the fabric.
Once your system has been properly installed, measured, and tensioned, seasonal removal and reinstallation should be relatively straightforward. We can demonstrate the process and remain available if you need assistance.


During the Shade Season
Inspect your system periodically and after significant weather.
Look for:
Loose turnbuckles, shackles, bolts, or fasteners
Changes in fabric tension
Persistent flapping
Frayed or displaced perimeter cable
Pulled corners or distorted attachment points
Damaged seams, stitching, or fabric
Fabric rubbing against nearby surfaces
Corrosion or damaged powder coating
Movement in posts, brackets, or foundations
Leaves, branches, or debris collecting on the sail
A properly tensioned sail should remain smooth and stable. If the sail begins flapping or its shape changes, something may have loosened or shifted.
Do not hang lights, decorations, signs, ropes, or other objects from the fabric or perimeter cable unless the system was specifically designed to support them. Chances are good we thought of this before you and added additional attachment locations on your posts.
How to Clean Your Shade Sail
For normal dirt, pollen, bird droppings, and environmental buildup:
Remove loose debris with a soft brush or gentle rinse.
Wash the fabric with clean water and mild soap.
Use a soft brush, sponge, or cloth.
Rinse thoroughly.
Allow the sail to dry completely before removal or storage.
Avoid:
-
Bleach and aggressive chemicals
-
Solvents
-
Abrasive brushes
-
High-pressure washing close to the fabric
-
Scraping ice or hardened material from the sail
-
Dragging the fabric across concrete, gravel, roofs, or landscaping
Always follow the fabric manufacturer’s specific cleaning and warranty instructions.
Fall Removal Checklist
Before removing the sail:
Photograph every corner and tensioning assembly.
Label each sail and its orientation.
Mark the corresponding attachment points.
Record the setting of each turnbuckle.
Prepare a labeled container for removable hardware.
During removal:
Release tension gradually and evenly.
Support the sail as you disconnect it.
Do not allow it to fall, drag, or catch on hardware.
Keep each sail’s hardware together.
Inspect the fabric, seams, cables, corners, and fittings.
Do not fully release one highly tensioned corner without controlling the remaining load. Large sails can move suddenly as tension is released.
WE are happy to book a spring install or fall takedown for any systems we install.


PDF FALL TAKE DOWN CHECKLIST
DENISE is working on it for sure! But if that link doesn't work, email her, and she will make sure you are taken care of!
Winter Storage
Before storing your sail, make sure it is completely clean and dry.
Store it:
-
In a dry, protected location
-
Away from rodents, chemicals, and sharp objects
-
Off the floor when possible
-
Without heavy objects stacked on top
-
Loosely rolled or folded without severe creases
-
In a protective container that will not trap moisture
-
Do not seal a wet or damp sail in an airtight plastic bag. Trapped moisture can cause staining, odors, mildew, and corrosion.
-
Label each stored sail with the project name, sail number, orientation, and corner designations. Store its labeled hardware with it.
Hardware and Structures During Winter
While the sails are down:
Inspect exposed brackets, posts, and welds.
Check for corrosion or damaged powder coating.
Secure loose cables and fittings so they cannot strike the structure.
Keep threads and tensioning components clean.
Store removable hardware in a dry location.
Address coating damage before corrosion spreads.
Spring Reinstallation Checklist
Wait until the risk of accumulating snow and ice has passed.
-
-
Before reinstalling, inspect:
-
Posts and foundations
-
Attachment brackets and welds
-
Turnbuckles, shackles, cables, and fasteners
-
Fabric corners, seams, and stitching
-
Powder-coated surfaces
-
All attachment locations
-
Look for winter movement, freeze-and-thaw damage, cracking, corrosion, or anything that appears different from the previous season.
-
When reinstalling:
-
Match each sail and fitting to its labeled location.
-
Reconnect the sail using the recorded corner assignments.
-
Apply tension gradually and evenly.
-
Do not completely tighten one corner at a time.
-
Confirm that the fabric has its intended shape and twist.
-
Verify that water can drain and cannot collect on the sail.
-
Make sure the fabric clears roofs, posts, walls, and sharp surfaces.
-
Confirm that every pin, shackle, fastener, and locking component is secure.
Never force a sail to reach its attachments. If it no longer fits normally, stop and inspect the structure, cable lengths, hardware, and attachment locations.
PDF SPRING INSTALL CHECKLIST
DENISE is working on it for sure! But if that link doesn't work, email her, and she will make sure you are taken care of!
When to Request Professional Service?

Professional assistance is recommended when:
-
The sail is large, elevated, or difficult to access.
-
A lift or fall-protection equipment is required.
-
A post or attachment point appears to have moved.
-
The sail no longer reaches its connections normally.
-
Hardware is bent, seized, damaged, or corroded.
-
The sail cannot be tensioned without excessive force.
-
The fabric, seams, cable, or corners are damaged.
-
Hardware labels or original tension settings are missing.
-
You are unsure how to safely remove or reinstall the system.
Need Help With Seasonal Service?
We can help inspect, remove, or reinstall your seasonal shade sails. We also provide guidance so owners who want to manage the process themselves understand the correct removal, labeling, storage, and reinstallation procedures.
Contact us before the first snow to schedule fall removal or before spring installation season to reserve service.
We offer spring and fall services to clients for projects we installed.
We always recommend speaking directly with the person you bought the product from.
However -
If you still need help with a seasonal install or takedown, contact us, and we will do what we can and provide information. If that is still not enough, we will take care of you - just note that any warranties do not apply.

